
Oct 16, 2026
Gift Paper Box Foil and Emboss Proof Approval Guide for Private Label Orders
Learn how to approve foil stamping and embossing on custom gift paper boxes with practical artwork, proof, finish and inspection checkpoints.
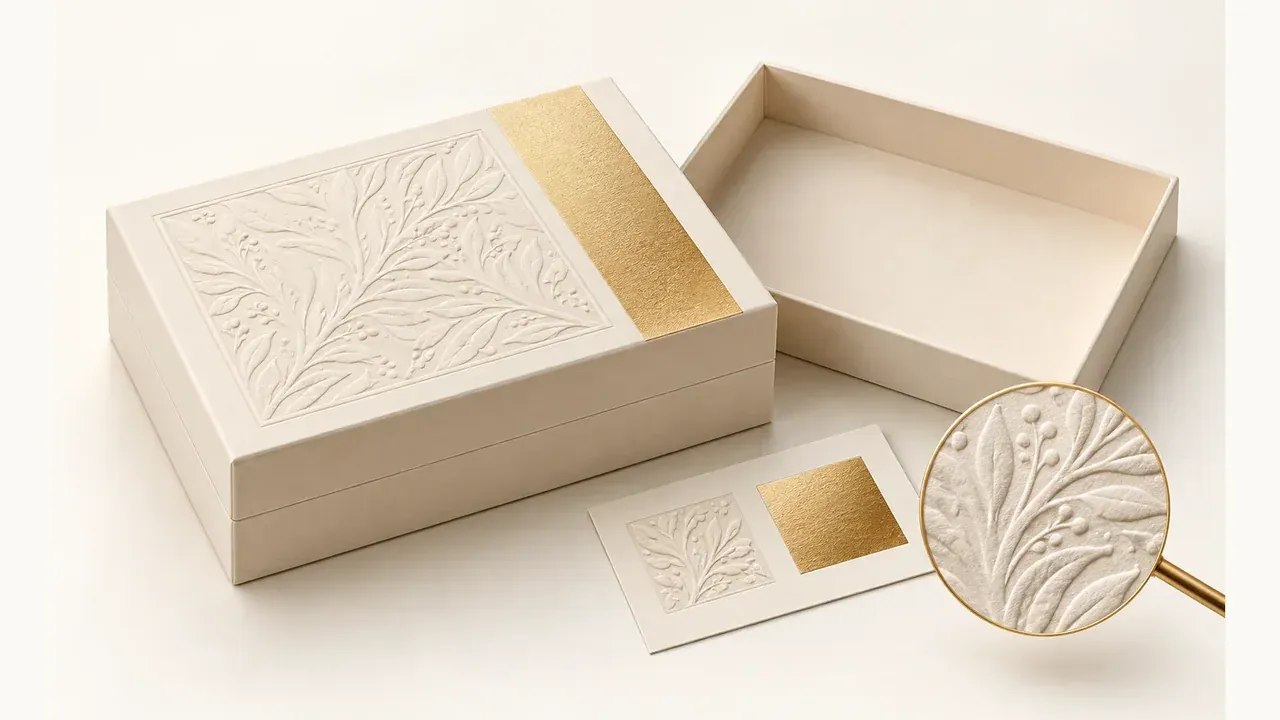
Foil stamping and embossing can make a private-label gift box feel considered before the product is even opened. They also introduce details that cannot be judged reliably from a flat artwork file: registration, pressure, paper wrap texture, corner behavior and how the finish looks under normal retail light.
This buyer guide explains what to approve on a physical proof and what to keep conditional until the factory confirms the board, wrap paper and production process. It is written for brands that need a repeatable decision record rather than a decorative mock-up alone.
Define what the finish must communicate
Begin with the purpose of the box: premium gift set, seasonal promotion, ecommerce launch or in-store presentation. Then specify which areas need to be tactile or reflective. A large foil panel, a fine logo, an all-over pattern and a combined foil-and-emboss mark each have different tolerance risks.
Describe the desired effect in plain language as well as with artwork: bright or muted foil, raised or recessed emboss, smooth or textured paper, and whether slight texture variation is acceptable. The supplier can then advise which wrap paper and tooling approach are suitable before the proof stage.
Prepare artwork for tooling, not just screen display
Supply editable vector artwork with clearly identified foil and emboss layers. Mark bleed, safe areas, fold lines, seam locations and the box face that will carry each finish. Very fine details, tight spacing and artwork too close to a wrapped edge deserve a pre-production review because they may fill in, distort or drift when the paper is wrapped over board.
Use a named revision for each submitted file and keep the approval comments with it. This prevents an older mock-up from being treated as the production instruction when several SKUs or colorways are in progress.
Review a physical proof under useful conditions
A digital rendering is helpful for direction, but it cannot prove foil adhesion or emboss depth. Ask for a physical proof or a factory-approved proof sample that uses the proposed paper and comparable tool detail. View it in diffuse daylight and normal indoor light, then compare it with the brand color reference and approved artwork.
Check that foil coverage is even, edges are clean, the embossed area is centered, and the effect remains clear at a normal viewing distance. For a combined process, inspect whether the foil sits accurately over the raised or recessed detail rather than shifting to one side.
Inspect wrapped edges, corners and lid fit
Rigid gift boxes add a wrapping step that changes how a finish behaves near folds and corners. Review the proof with the lid closed and open. Look for cracking, lifting, wrinkles, exposed board, unexpected seams or finish elements that become misaligned where the wrap turns an edge.
If the lid contains a large embossed panel, also confirm that the board and wrap combination still allows the intended lid fit. A beautiful top panel is not an acceptable trade-off if the lid binds, rocks or scuffs during opening.
Convert approval comments into production checkpoints
After the proof is accepted, create a concise master sample record: artwork revision, foil color reference, finish location, acceptable visual variation, photo angles and any non-negotiable details. Use it for pre-production approval and final inspection. For multi-SKU programs, include the matching SKU name and packaging dimensions so components cannot be mixed.
Do not state an unconditional color match or defect-free promise unless it is supported by the agreed sample and contract. Instead, document the approval standard, the inspection method and the escalation path if a variation is found before shipment.
When a simpler finish is the lower-risk option
Fine foil beside a wrapped edge, a large raised panel on a very textured paper, or a late artwork change after tooling review may not be suitable for every deadline or budget. A deboss, a smaller foil area, a smoother wrap sheet or a revised placement can protect readability and production consistency. A supplier that explains these limits early is helping the buyer make a safer choice.
Quotation checklist
• [ ] Box structure, board style, dimensions and lid/base relationship
• [ ] Wrap-paper name, color reference and surface texture requirement
• [ ] Vector artwork with separate foil and emboss layers
• [ ] Finish location, safe areas, fold lines, seams and edge-clearance notes
• [ ] Foil color/finish reference and emboss direction or depth intent
• [ ] Physical proof requirement and artwork revision to be approved
• [ ] Master-sample photos and production inspection checkpoints
• [ ] MOQ and lead time confirmed after tooling and material review
• [ ] Carton protection requirements to prevent corner scuffing in transit
• [ ] Inspection, rework and shipment-release process agreed in writing