
Oct 19, 2026
Gift Paper Box Die-Cut Insert Fit and Assembly Sequence Guide
A procurement guide to specifying die-cut insert fit, board material, assembly sequence, sample approval and delivery planning for custom gift paper boxes.
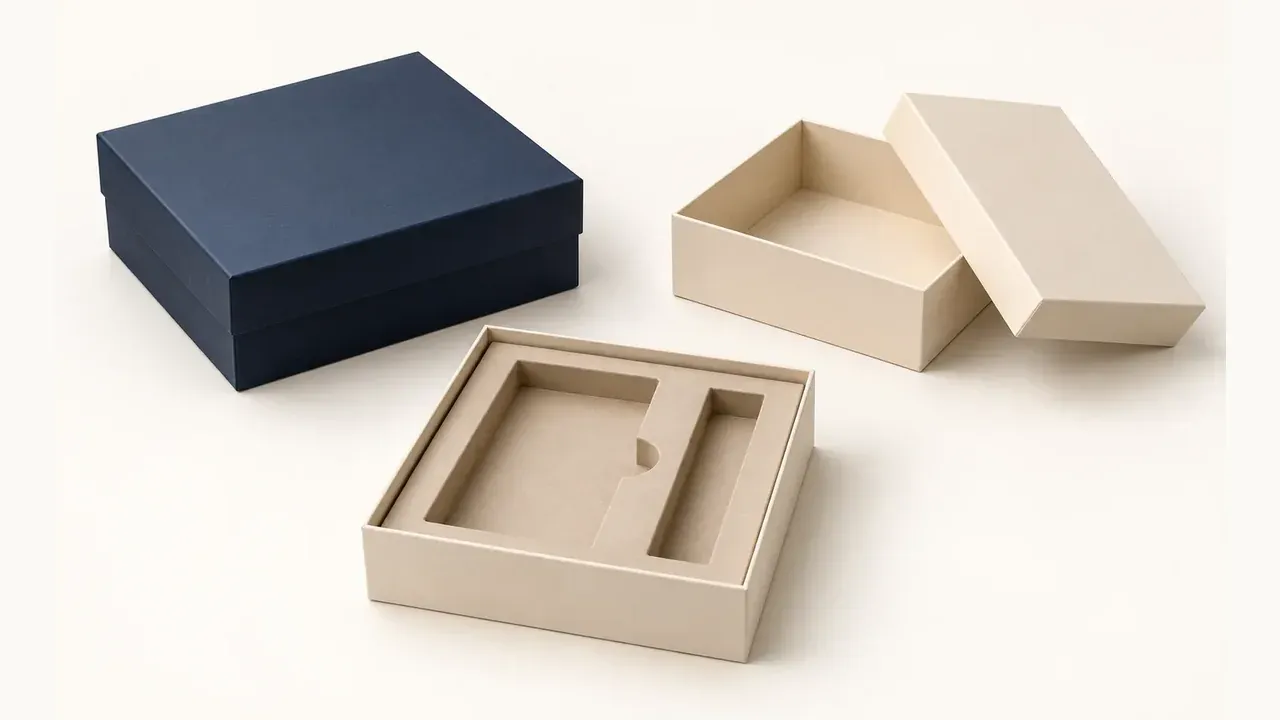
A custom gift paper box can look premium in an open sample yet become difficult to pack when an insert is too tight, too loose or assembled in the wrong order. The insert, product, box wall and lid need to work as one system. Buyers get more dependable quotes when they describe that system instead of requesting an insert “to fit the product.”
This guide helps private-label buyers specify die-cut paperboard inserts for gift boxes, approve an assembly sample and plan the handoff to packing. It avoids assumed tolerances or performance claims because fit depends on the actual product, board, finish and assembly method.
Map the product and unboxing sequence first
Provide the physical product or a dimensional model, including any cap, cable, accessory, protective sleeve and component that shares the box. Explain what the recipient sees first when the lid opens and which item must be removed first. A product that is held by the insert at the side has different needs from one that rests on a tray or sits in a multi-cavity layout.
If the product has fragile surfaces or sensitive finishes, note every contact point. The insert should support the intended presentation without creating rub points, pressure marks or difficult removal during normal unboxing.
Specify the box and insert materials together
The box board, wrap, lining and insert board influence available space and assembly behaviour. Ask the supplier to identify the proposed box structure and the insert material, colour and finish. Where a coated, laminated or flocked surface is required, include it in the sample because it can alter thickness, friction and the way cut edges appear.
For logo-printed gift paper boxes, state whether the insert must visually match the exterior brand colours or whether a neutral interior is acceptable. A clean contrast can simplify inspection, while a fully matched interior may require closer colour approval.
Define fit by function, not only by dimensions
The drawing should show product orientation, cavity location, finger notch or lift feature, accessory compartments and the intended clearance around visible surfaces. Tell the supplier what “fit” means for the program: stable during transit, easy removal at retail, centred presentation, or a combination of these needs.
Approve the fit with the actual product wherever possible. If a proxy is used during development, identify it and require confirmation with the final product before production. Even small changes to an accessory or protective film can make a visually similar cavity perform differently.
Agree the assembly sequence before production
An insert can be correctly die-cut and still be assembled incorrectly at the packing line. Ask for a simple sequence showing whether the insert is folded, locked, glued or placed loose; when the product is loaded; and when the lid is applied. Identify any orientation mark needed by the packing team.
If the box is supplied flat or partially assembled, confirm who completes each step and how components are protected during shipment. This avoids finding out after delivery that the insert needs a tool, jig or unexpected manual step to achieve its intended shape.
Inspect a finished, packed sample
Review more than a flat die-cut blank. The approval sample should include the selected box, insert, product or approved proxy and all relevant accessories. Open and close the lid, remove and replace the product, and inspect whether the item remains correctly presented after ordinary handling.
Record observations such as loose movement, difficult removal, exposed cut edges, visible board compression, inconsistent cavity position, lid interference or surface rub. If transit protection is required, inspect that complete pack-out rather than judging the insert separately.
Link approval to MOQ and delivery planning
Die cutting, special board and assembly requirements can affect the production route, MOQ and lead-time discussion. Supply the final size range, component count, artwork and expected order quantity together. Request separate confirmation of sample timing, production sequence and how finished boxes will be packed in export cartons.
For repeat orders, use the approved box and insert sample as the master reference. A change to board, product dimensions, insert layout or assembly method should be reviewed before production, even when the exterior logo artwork does not change.
Quotation checklist
• [ ] Finished box style, internal dimensions, lid relationship and exterior/interior finish
• [ ] Actual product, accessory list and required presentation or removal sequence
• [ ] Insert material, colour, finish, die-cut layout and all product contact points
• [ ] Cavity orientation, finger notch/lift feature, accessory compartments and fit function
• [ ] Assembly sequence, glue/lock points, orientation marks and responsibility for final packing
• [ ] Finished packed-sample review for fit, removal, lid closure, rub points and presentation
• [ ] Master sample and written change control for product, board, layout or assembly changes
• [ ] MOQ, sample timing, production schedule, carton packing and delivery destination